|
So often athletes want to skip over the fundamentals and get right to the “good” stuff. They want to train like their favorite college or professional athlete does. The problem is this is like skipping kindergarten and going straight to the 12th grade. They only get to see them train as college or professional athletes, never really knowing how much time and effort was put into learning the fundamentals. We like to say in the sport performance training field that you have to earn your weight and the exercises you are permitted to do. You have to go through the process of learning how to move properly and then execute the exercises properly. Notice how I separated the two, movement and exercise. If you cannot perform the movement properly you should not be allowed to perform the exercise. So many times athletes want to attempt exercises that they do not yet possess the proper movement for. If an athlete wants to perform a loaded front squat, but cannot go through the movement unloaded first they will have to practice the movement and perform developmental exercises to assist them in grooving the pattern before they are allowed to do the exercise. We see this in many aspects of life nowadays, skipping over the process and going right to the product. We will not allow this to happen, training programs must be earned through dedication and consistently. We will not make exceptions to this rule. Fundamental comes first!
There will be hard work to accomplish these tasks, do not think for a minute that it will be easy. Although we now look at first grade as learning the basics, it was not basic to the new minds learning these steps for the first time, neither is sport performance training. If we adhere to following the process the product will speak for itself. So what are the basics of sport performance training? The basics involve learning how to perform bodyweight movements properly such as squats, split squats, hip hinges, jumps, skips, rows, chin ups, planks and push ups. Master the basics before you make progressions to more advanced movements. I do not remember seeing any first grades taking trigonometry for their math class; apply the same principles to sport performance training.
1 Comment
There are three components to a well rounded warm up that every athlete should be doing. They include self myofasical release, prehab & activation work and movement prep. These components prepare the athlete to have a more efficient and productive training session.
Self myofasical release takes place in the first five minutes of the training session where the athlete uses a foam roller to work on improving their tissue quality. A number of rolls can be performed over each area of the body; usually eight to ten will suffice. This is the time to break up adhesions or knots in the tissue and transport nutrients to the area for repair and growth. This also prepares the muscles for the next step in the warm up. Prehab & activation work is what we like to call our developmental part of the warm up. It is when the athlete is developing their mobility and stability. Each athlete has their own unique set of strengths and weaknesses; this is the time to work on those weaknesses. The limitations that are holding an athlete back need to be addressed and turned into their strengths. Hip mobility and core stability are two areas of our developmental process that are usually addressed most frequently. These are areas that athletes tend to have the most difficulty mastering, but are extremely important to their success. Proper hip mobility enables the athlete to be in a stance that is most suitable to playing sport and having stability throughout the core gives the athlete the ability to transfer force through their lower body to their upper extremities. The final part of the warm up is the movement prep section which focuses on preparing the athlete to perform the exercises that are part of their training program for that training session. This involves going through body weight movements that are performed dynamically. This includes squatting, lunging, pushing, pulling, skipping and bounding. The athlete is now primed to execute the training session to the best of their ability. A proper warm up takes about 20-25 minutes to complete and is a key to reducing injuries, moving efficiently and having a great training session. Takes the time to prepare your athletes for the training session ahead with a proper warm up and you will see your athletes moving and feeling better, and yeah, they will be stronger and faster too! Single leg training has become more popular in the recent years as a way to compliment bilateral leg training and in some instances replace it. Single leg training use to be thought of as inferior to its bilateral leg training counterpart. This was assumed for some basic logistical reasons such as you can lift more weight if you are two legs instead of one. This seems to make sense when you take it at face value. If you are on both legs you will be able to lift more weight and therefore get stronger. The problem arises when we lose sight of what these athletes are training for….to be better at their sport! When we play sport we are constantly on a single leg unless we are not part of the play. There are very few examples when you are on both legs with your body weight distributed evenly between both legs. Do not take this the wrong way, this is not an argument to get rid of bilateral leg training, it is an argument for including it along side our bilateral leg training. Bilateral leg training will never go away, nor should it. It is extremely effective at building strength, speed and power. Let’s make sure we add some single leg training to our programs. I mentioned before how sport is being played on a single leg. If you are moving, both feet are never planted at the same time. Athletes should therefore train on a single leg. There are many different single training exercises that are great at building a top level athlete. Below you will find a few that I really enjoy doing. 1. Dumbbell Forward Lunge – to perform the dumbbell forward lunge take a big enough step out that your front and back leg will form a “L”. Make sure that you get your front heel on the ground when you step forward and drive through it to stand back up. The upper body should remain upright throughout the exercise. 2. Barbell Single Leg Romanian Deadlift – to perform the barbell single leg Romanian deadlift begin by bending your knee and hinging your hips. The leg coming off the ground should come up at the same rate the upper body is dropping towards the ground. Continue to push the leg up and back until it becomes parallel to the ground. To return to the standing position drive through your heel and extended your hips. 3. Rear Foot Elevated Split Squat – to perform the rear foot elevated split squat elevate one foot onto a bench or box. Descend until the back knee brushes the ground (No bouncing!). Drive through your heel to return to the starting position. 4. Single Leg Squat w/ Box – to perform the single leg squat on a box first choose a light weight for a counter balance, especially when starting this exercise for the first time. Descend until your hips at least pass parallel then drive through the box to return to the top. Maintain a neutral spine throughout the exercise. 5. Lateral Lunge w/ Slideboard – to perform the lateral lunge on the slideboard (sb) start with one foot off the sb and one on the sb in contact with one of the booties. Begin by bending your knee and pushing your hips back. As you put your hip into abduction make sure to go under control then return to the standing position. These exercises will add strength that will translate to improved performance on the field or court!
The power clean is one of the best ways to add an amazing amount of strength and power. It requires both an incredible amount of mobility and stability to move through such an explosive exercise. It will improve most all measurable athletic performance parameters on the field and in the training facility. Assuming that the athlete has the proper fundamental movement skills required to perform the power clean the proper set up and coaching cues should be the first thing to get attention. Power Clean Set Up Positions w/ Coaching Cues * Hang Position- standing position, elbows locked, and medium hook grip 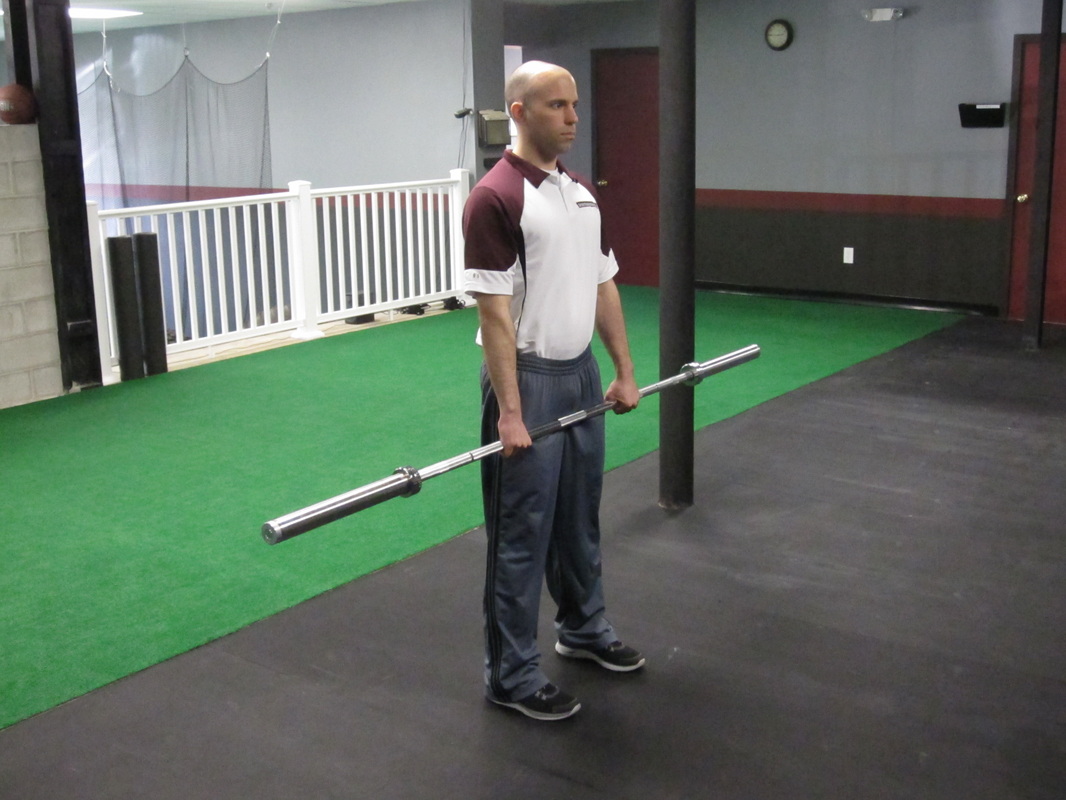
Rack Position- get the bar on shoulders from hang position- elbows up, humerus parallel to floor- weight supported by shoulder NOT hands- drop the bar and catch it in the hang position 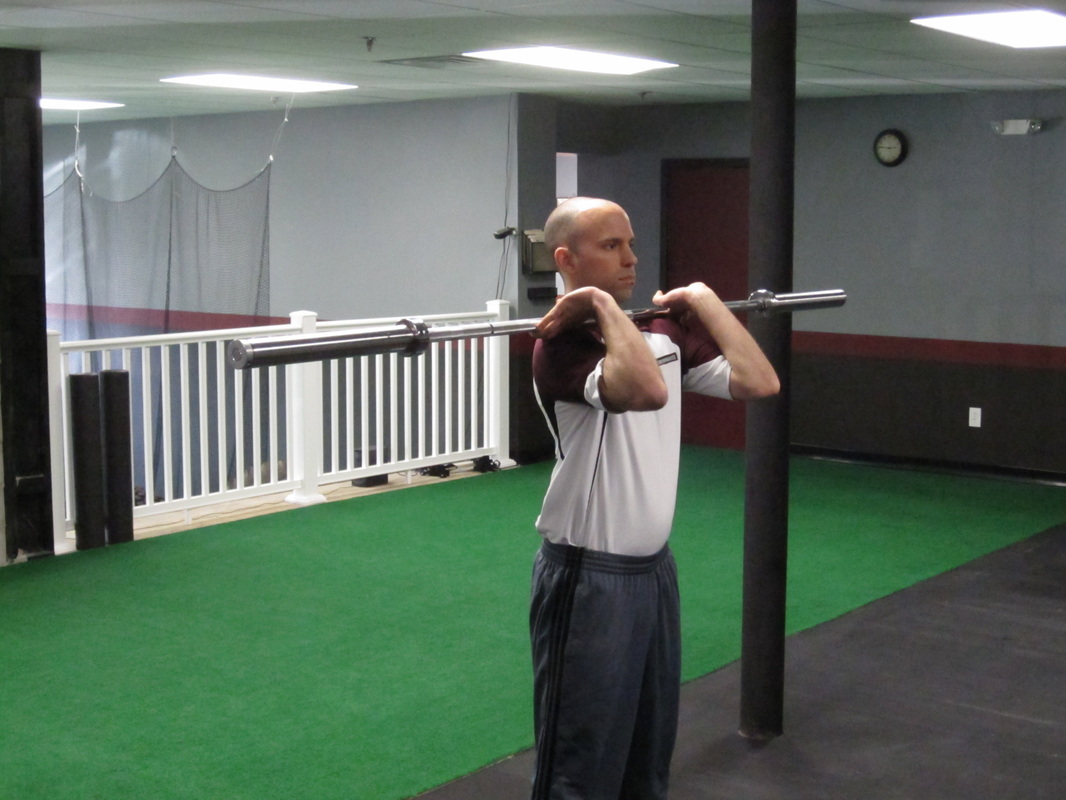
Jump Position- bar is at mid thigh- hips and knees are unlocked- bar is touching skin/clothing Squat Jump Position- jump w elbows locked and land in squat position 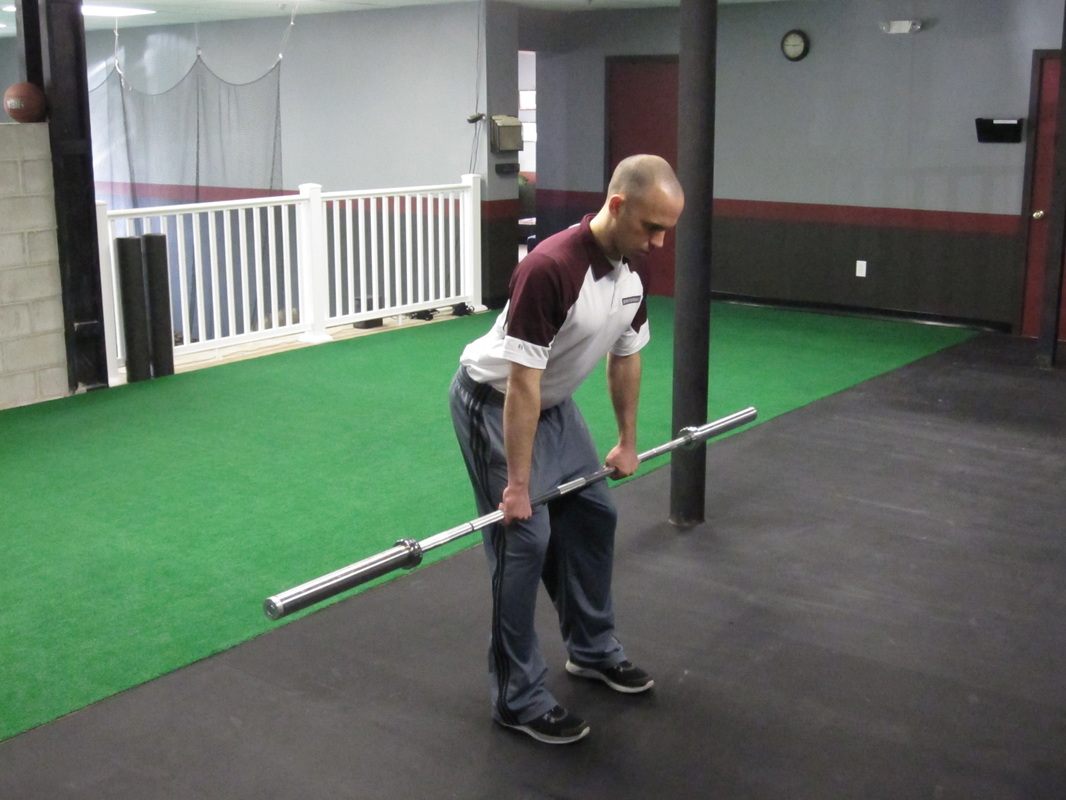
Jump w/ Catch- jump and catch the bar on shoulders- elbows straight to slammed forward- aim your shoulders at the bar- slam bar onto shoulders 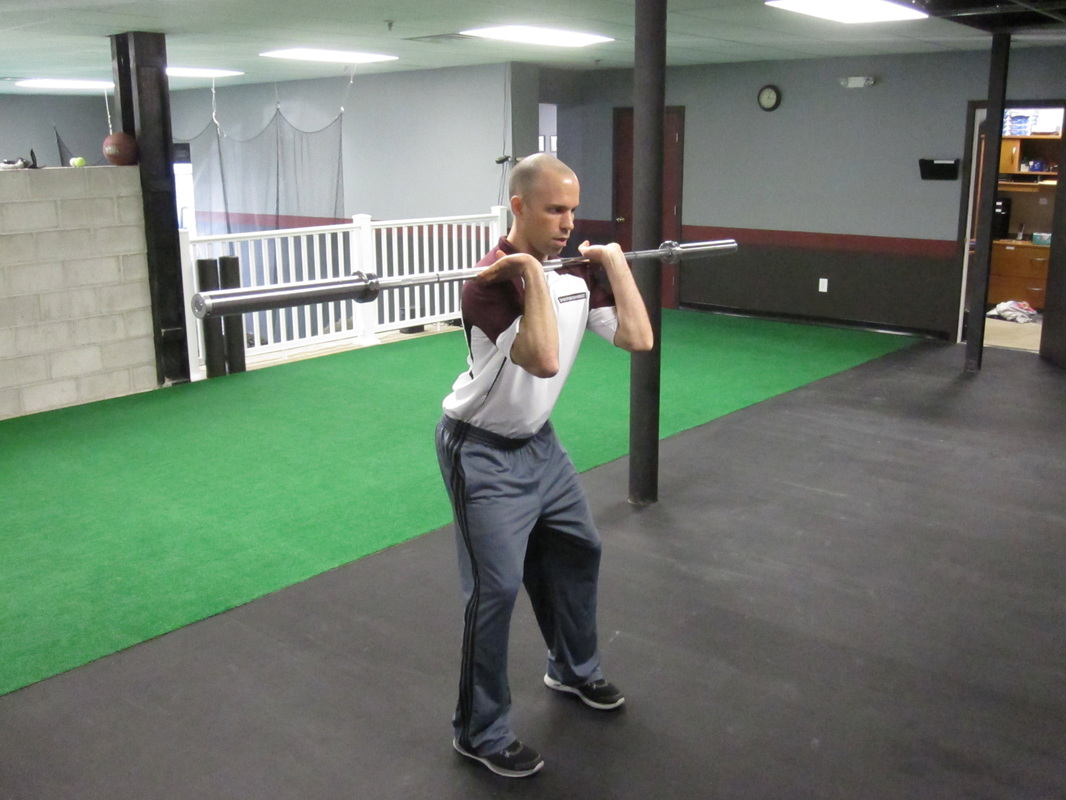
Front Squat –bar is on the shoulders-squat to slightly pass parallel while keeping the elbows up, humerus parallel to floor 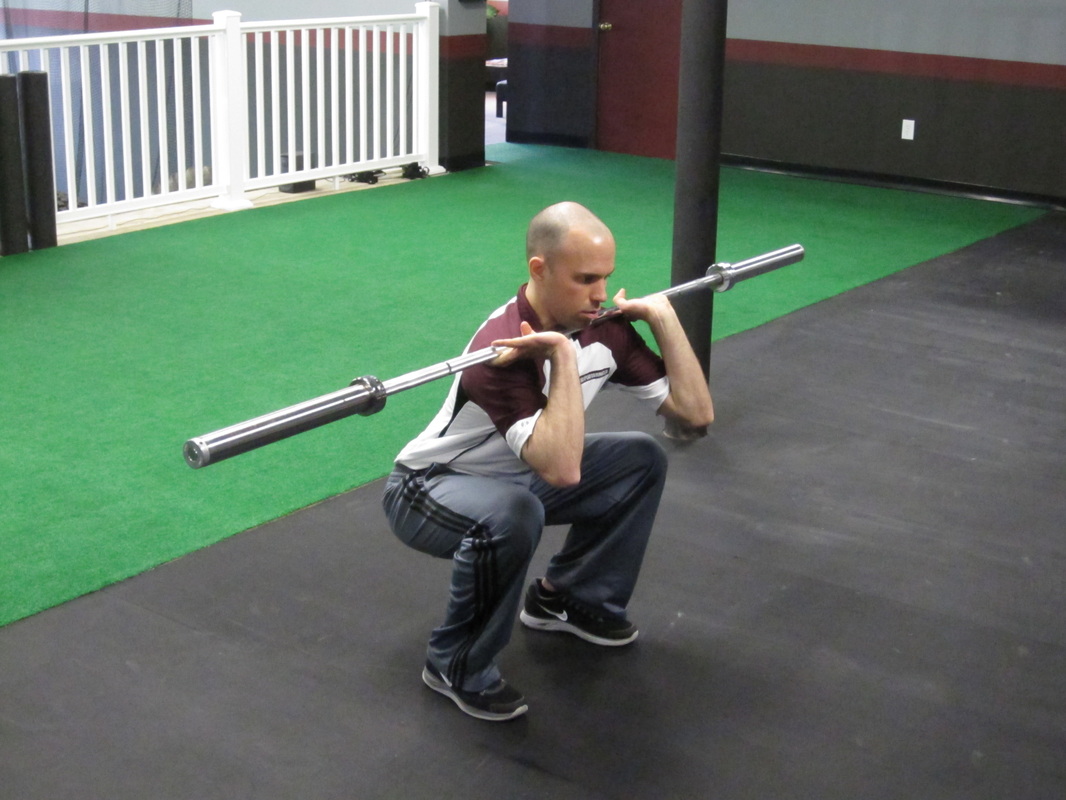
Power Clean Progressions & Variations
Power Clean (Mid Thigh, Above Knee, Mid Shin, Floor) Power Clean & Front Squat (Mid Thigh, Above Knee, Mid Shin, Floor) Squat & Clean (Mid Thigh, Above Knee, Mid Shin, Floor) This is by far one of the best exercises for athletes to develop a huge amount strength and power that will transfer from the training facility to the field. Problems arise when the power clean is introduced without the proper progressions and is therefore rushed. Before a power clean is attempted athletes should possess the proper mobility and stability to perform the movement. Rushing the process or simply skipping over it to get to a poorly executed product is not the way to go about such a complex exercise. When taught and progressed properly this is a great exercise to add to your training program. * power clean set up positions w/ coaching cues from “Starting Strength Basic Barbell Training” 3rd Edition, Mark Rippetoe Force= mass x acceleration (acceleration is a component of force development) This physics equation explains to us how important force development is when trying to improve speed. Since we know that the majority of sport movement is all about acceleration, if we improve that aspect we will also improve our all out speed. Therefore the best way to train for speed is to increase your ability to apply the most force into the ground as fast as possible. Heavy lifts involve applying tremendous amounts of force into the ground, pushing heavy sleds involve applying tremendous amounts of force into the ground and sprinting involves applying tremendous amounts of force into the ground. I am beating a point to death if you did not notice. Speed has to be trained just like any other component in the sport performance spectrum, but being fast does have huge correlation with how strong you are. Included in your sport performance program there should be speed drills to assist in being as fast as you can become. These include, but are not limited to wall drills, 10 yard splits, 5-10-5 agility and 10 yard marching sled drives Wall Drills There are progressions to performing the wall drive such as flexion of the hip to hold, repeated flexion to extension of the same leg, marching, skipping and single leg exchange. One thing holds constant for all the progressions though and that is the upper body remains rigid, the lumbar spine remains in a neutral position, the abdominals are pulled in and the shoulders are pulled back with proper neck alignment. 
10 Yard Splits The 10 yard split is going to make an athlete focus on the first push into the ground. The athlete can set up in a three point stance or the appropriate sport specific stance and work on the initial acceleration. Remember to use a strong first push and drive with your arms. 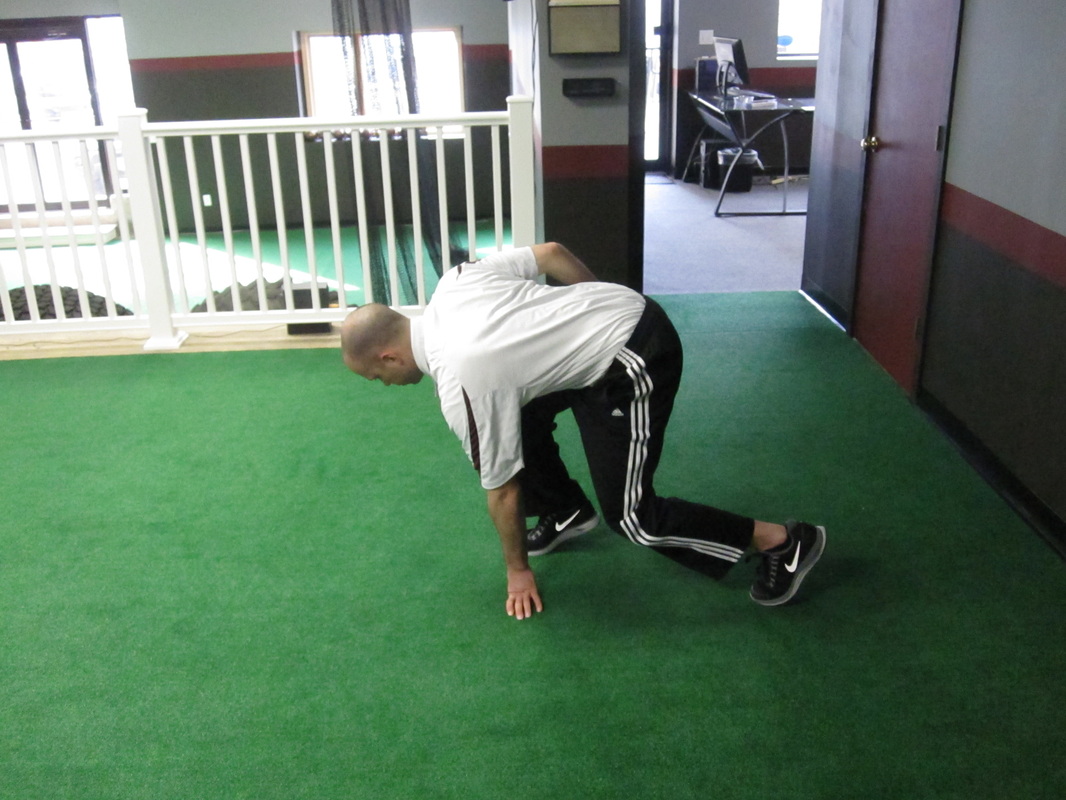
5-10-5 Agility To perform this drill you need three cones with both end cones being set up 5 yards from the center cone. The athlete can go in either direction for their first five yards, and then cover the next ten yards to the other cone and sprint pass the center cone. The athlete must touch the imaginary line with each end cone. This drill incorporates the ability to stop and change direction quickly. 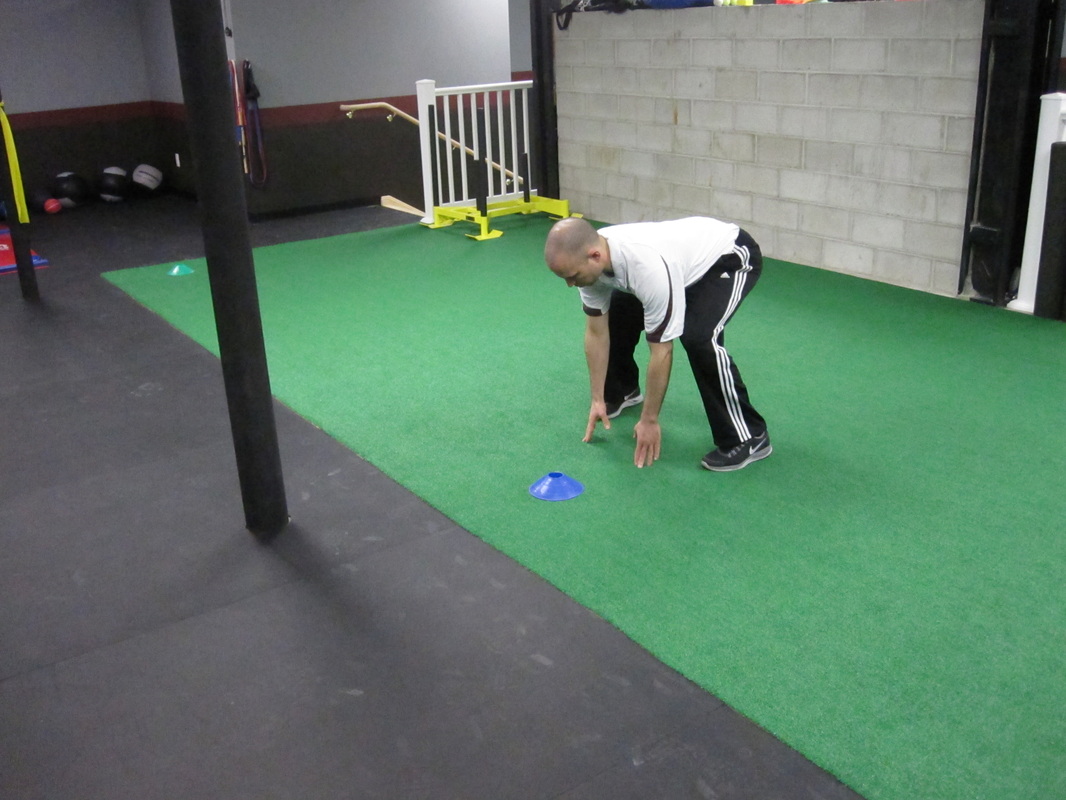
10 Yard Sled March This speed drill acts like the wall march drill, but now there is a moveable load being used. It should be heavy enough that they are not able to run. Push into ground as hard as possible and drive the sled. 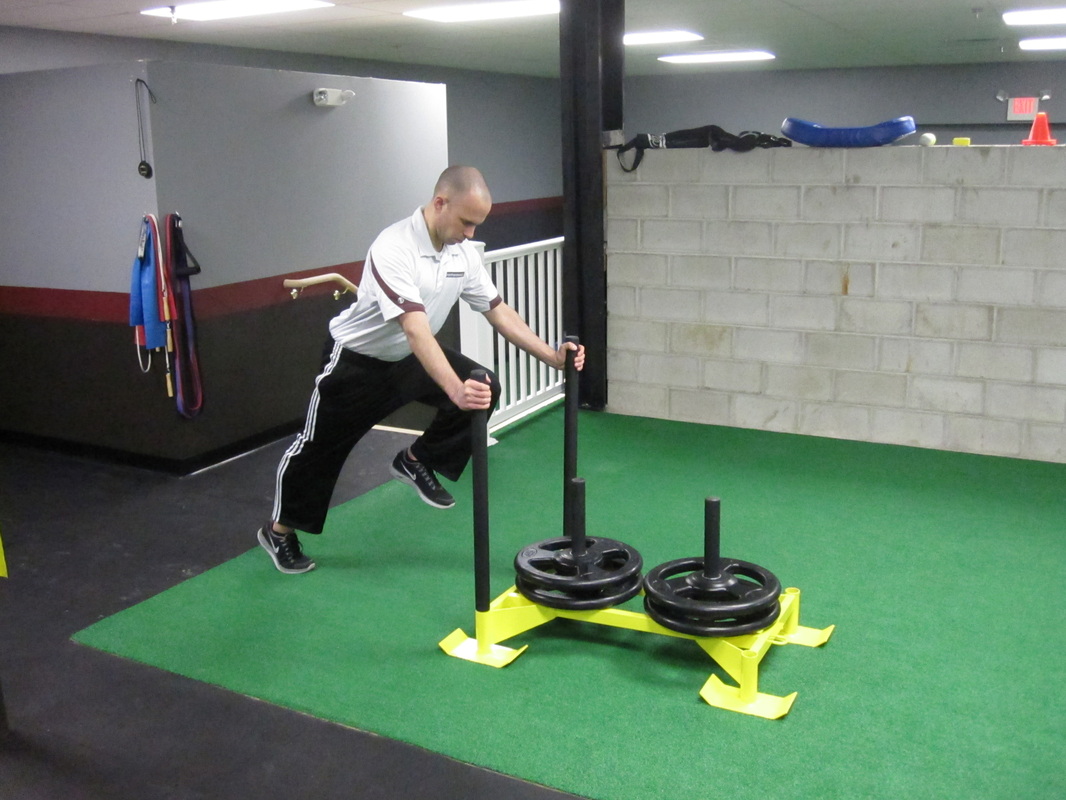
There are four great speed drills to add to your tool box.
The off-season is a time to recover from any injuries that were sustained during the regular season, take care of any asymmetries that were developed from the specific sport played and increase strength, power and speed so that you are ready to dominate during the regular season! The off-season is usually broken down into three sub categories, which include the early, general and late off-season training program. The off-season ranges from sport to sport so when putting together a performance training program the actual length must be considered to program accordingly.
The early off-season is in most cases the first two weeks where there can be complete rest or light physical activity. This is the time to recover both physically and mentally from the regular season. There should be nothing strenuous done during this period. The general off season is the time to focus on cleaning up any asymmetries that might have been acquired during the regular season along with any loss of proper biomechanical efficiency. Once those situations are addressed it is time to begin increasing strength, power and speed components. This should comprise the majority of your off-season. The late off-season is when we should be peaking and focusing on any additional conditioning that is required of the specific sport. This varies from sport to sport and athlete to athlete. For sports that are more aerobically based such as field hockey, aerobic conditioning will be increased earlier in the late off-season then other more anaerobically focused sports. Some athletes also take different amount of time to gain the aerobic level of conditioning that is needed for their sport. The off-season (which encompasses the first day after the regular season ends until the first day it begins) is the time to get stronger, faster and more powerful. You should not start your off-season training a few weeks or even months before the beginning of the regular season. If being your best on the field is important to you, then taking your off-season performance training seriously is required. This is the time to put in the work so you can reap the benefits during the season. Variety is the spice of life, right? Well that’s not always the case when designing a strength and conditioning program. Great training programs focus on certain main lifts throughout their athletes training career. Although the same exercises might be used there are variations that can be introduced that challenge the athlete in new ways without removing the specific exercise.
Changing the sets, repetitions, tempo and rest periods all have an effect on outcome of the training program. Switching the sets and repetitions will affect the volume and intensity of the exercise. Performing 10 sets of 2 repetitions at 80% of your 1 repetition maximum or 3 sets of 10 repetitions at 60% of your 1 repetition maximum will effect what you get out of that exercise. The tempo could change the time under tension, how much eccentric (negative part of the exercise) stress is placed on the body or even power development with the concentric (positive part of the exercise) phase being performed explosively. Rest periods will greatly affect the level of conditioning that can be obtained during your training session. If the goal is strength and power development a long rest period will be taken. If it is total body conditioning then a decrease in rest periods will be used. Altering the exercise by using different equipment is another option. An example would be going from performing a lunge with dumbbells at your side to kettlebells in a racked position on the shoulders. This will slightly change the exercise which will give a feel of variety to the athlete while still accomplishing the main lift. Another example would be performing an overhead barbell lunge. The overhead barbell lunge will include a lot more strength from the core and shoulders. Simple modifications add variety to the same exercise while accomplishing the goal of the strength and conditioning coach. The point is the “same” exercise can be programmed in different ways that accomplish the goals of the coach while adding a little bit of variety for the athlete. We want to avoid stagnation, while still using the best exercises for building strength and power. This should accomplish two things, first and foremost the athlete is getting stronger and second the athlete receives a little bit of variety in their training program because variety is the spice of life. The biomechanical analysis is performed before even thinking about what sport performance program will be written for an athlete. It is literally the first step in figuring out what an athlete needs in their program. It is not a measurement of how strong or powerful they are. The analysis takes into consideration the mobility, stability and neuromuscular patterning of the athlete. We are looking at how well they perform basic movement patterns. The joint by joint approach which is taken by many of the top professionals in the field approaches the body as alternating mobile and stable joints. An example of this would be how the ankle is a mobile joint and the next joint up the kinetic chain; the knee is a stable joint. There has to be a balance of mobility and stability while performing movement to be efficient.
At SportPerformanceU we perform ten different tests during our biomechanical analysis. Each test encompasses the ability to be both stable and mobile as is the case with any athletic or functional movement that is being performed. The overhead deep squat is one of our ten tests that look at multiple things during one movement. We are examining the ability of the ankles, hips and thoracic spine to be mobile while the knees, lumbar spine, and shoulders are stable. This test also looks at the neuromuscular patterning of the body. This is the motor learning process, where the muscles learn to “fire” properly and efficiently. An example of this would be examining an athlete that has the ability to perform an overhead deep squat in the supine position, but when standing is not able to accomplish the same task. The stability and neuromuscular firing patterns needs to be cleaned up. This is just one of the ten tests we do to get a full picture of what each athlete needs. Everyone is an individual and desires a training program that is specific to them. It is so important to perform this biomechanical analysis to have a starting point for each athlete. If an analysis is not done it becomes a guessing game. And I do not want the training programs I write for my athletes to involve any guess work. Every athlete wants to throw the ball farther and faster than they did the day before. Baseball pitchers want to see the radar gun go up and quarterbacks want the yardage of their passes to climb. It is a goal of all baseball pitchers and quarterbacks out there. The problem is that getting a “stronger arm” as most of them think is the solution is neither going to help the athlete throw the ball farther or faster. Let me explain, as I am sure most of you find that statement slightly confusing. Throwing athletes need both the right amount of stability and mobility at certain joints to complete the task of throwing. They also need a stable core that is able to transfer a great amount of force that has been developed from a sufficient amount of strength and power training modalities. Those attributes will give throwing athletes this “stronger arm” we are referring to.
When developing throwing mechanics the whole body must be considered. Two key attributes that I want to focus in on are the ability of the shoulders to be stable and the thoracic spine and hip region to be mobile. If both of these areas have the right amount of mobility and stability then the core will have the ability to transfer a greater amount of force from the ground through the release point. We also need the ability to disassociate our hips from our shoulders. It is with this rotation that we are able to create greater amounts of power. All of this is for naught though if we do not develop the strength and power necessary to increase our velocity. The performance training program is extremely important when trying to add speed and distance to your throws. Lower body double and single leg exercises that encompass both strength and power have to be a staple of this training program. Focus on adding the proper amounts of mobility and stability along with increases in strength and power to get that “stronger arm” you are searching for. The results will speak for themselves. Youth sport and athletic development has exploded in recent years. The introduction of sport performance training programs has led to greater increases in strength, power and speed while reducing injury rates. The sport performance community continues to learn better ways to make the complete athlete. This sounds promising for every up and coming athlete out there. The question is how do athletes, coaches and parents know when one sport performance training program is better than another. I am going to list three tips that should help you find the perfect coach. First, what are their credentials? Did they attend a four year college or take a weekend seminar? Do they hold the most recognized and respected certifications in the field or did they get one off the internet? Is this there first go around or have they been in the trenches for years? Feel free to ask all these questions. It is your right and responsibility to know who is going to be coaching your athlete.  Second, ask about the sport performance program. Is there a physical assessment done before the athlete starts the program? Is it a one size fits all cookie cutter approach where large groups are poorly supervised or is it a small group with individualized programming specific to each athlete. A well written sport performance program should include the following: 1. Self Myofasical Release 2. Static Stretching 3. Mobility & Activation 4. Dynamic Warm Up 5. Speed & Agility 6. Power & Strength 7. Sport Conditioning  Third, does the facility have the proper equipment and tools necessary to execute the sport performance training program? Are there the basic necessities such as a squat rack, bench, barbell, Olympic plates and dumbbells? Additional tools that help are medicine balls, drive sleds, slide boards, kettlebells and plyo boxes. These are the important pieces of equipment for running a sound sport performance training program. Below is The University of Connecticut's football strength and conditioning facility. 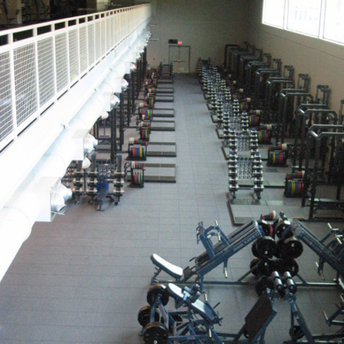 These tips should help you decide where to bring your athlete for their sport performance training program.
|
Archives
May 2024
Categories
All
|
 RSS Feed
Proudly powered by Weebly